Monday, September 2, 2019

These Aren't the Grains You're Looking For...


When you think you got it but you don't got it and you realize what just happened

It's September!  What does that mean? Well, it's the first day of Halloween, for starters!  Secondly, this is the time when you start on crafts or other projects you need done by Christmas.  Almost two months ago, when I was brewing Darkseid, we started coming up with an idea for what would be this year's Christmas brew.  I've done it once, but now I have a temp-controlled fermentation chamber (an old fridge with a $25 plug-in temp controller from Willhi that's done wonders so far), so I'd be remiss if I didn't brew more frequently!

In discussion with some co-workers who were interested in helping fund the operation, we decided the best brew to attempt would be a chocolate orange stout!  Brewing it now would allow everything to meld and mellow and the flavors to really mature and pop by mid November/early December, perfect timing for the holidays!  But wait, there's more!  To make this event more interesting, we decided to also brew a batch of American Pale Ale (ideally, a variation of my well-received Johnnie Flyer APA).  This one would be simple, inexpensive, and only take about a month to finish.  That means that when we all have to come back to bottle the chocolate orange, we'd have fresh beer to drink.

Even better: because the wife kicked my brewing operation out of the house after Darkseid inundated our entire very-poorly-ventilated dwelling with cloyingly sweet wort-smell, I've recently purchased a propane burner that works really well.  Heated up the kettle super fast, but flame controls were easy to use, so I only had one boil-over.

It seemed like a wonderful plan.  Then everything changed when the Fire Nation attacked...
when you got your thing going, and think things are fine, but then the fire nation attacks


I ordered the grain bill online.  My LHBS doesn't let you grind your own grain, so you've gotta sit there and wait while they do it for you.  Last time, the lady who did it offered, "Why don't you use our online form next time! It'll save you a lot of time, and the grain will be ready to pick up when you get here!"  So I took her up.  LHBS is almost an hour's drive from my house, but the day before brew day, I'd be in the area anyway, so I might as well make it a quick stop.
Was surprised and slightly put off that there was a $2 fee to have everything bagged separately.  Because I used about 7 different types of grain over the two batches, and knew it was gonna be about $45 for the whole thing, I figured why not?  An extra $2 isn't going to do much, but at least all my grain will be separated for easy use on brew day.  Boy was I wrong!

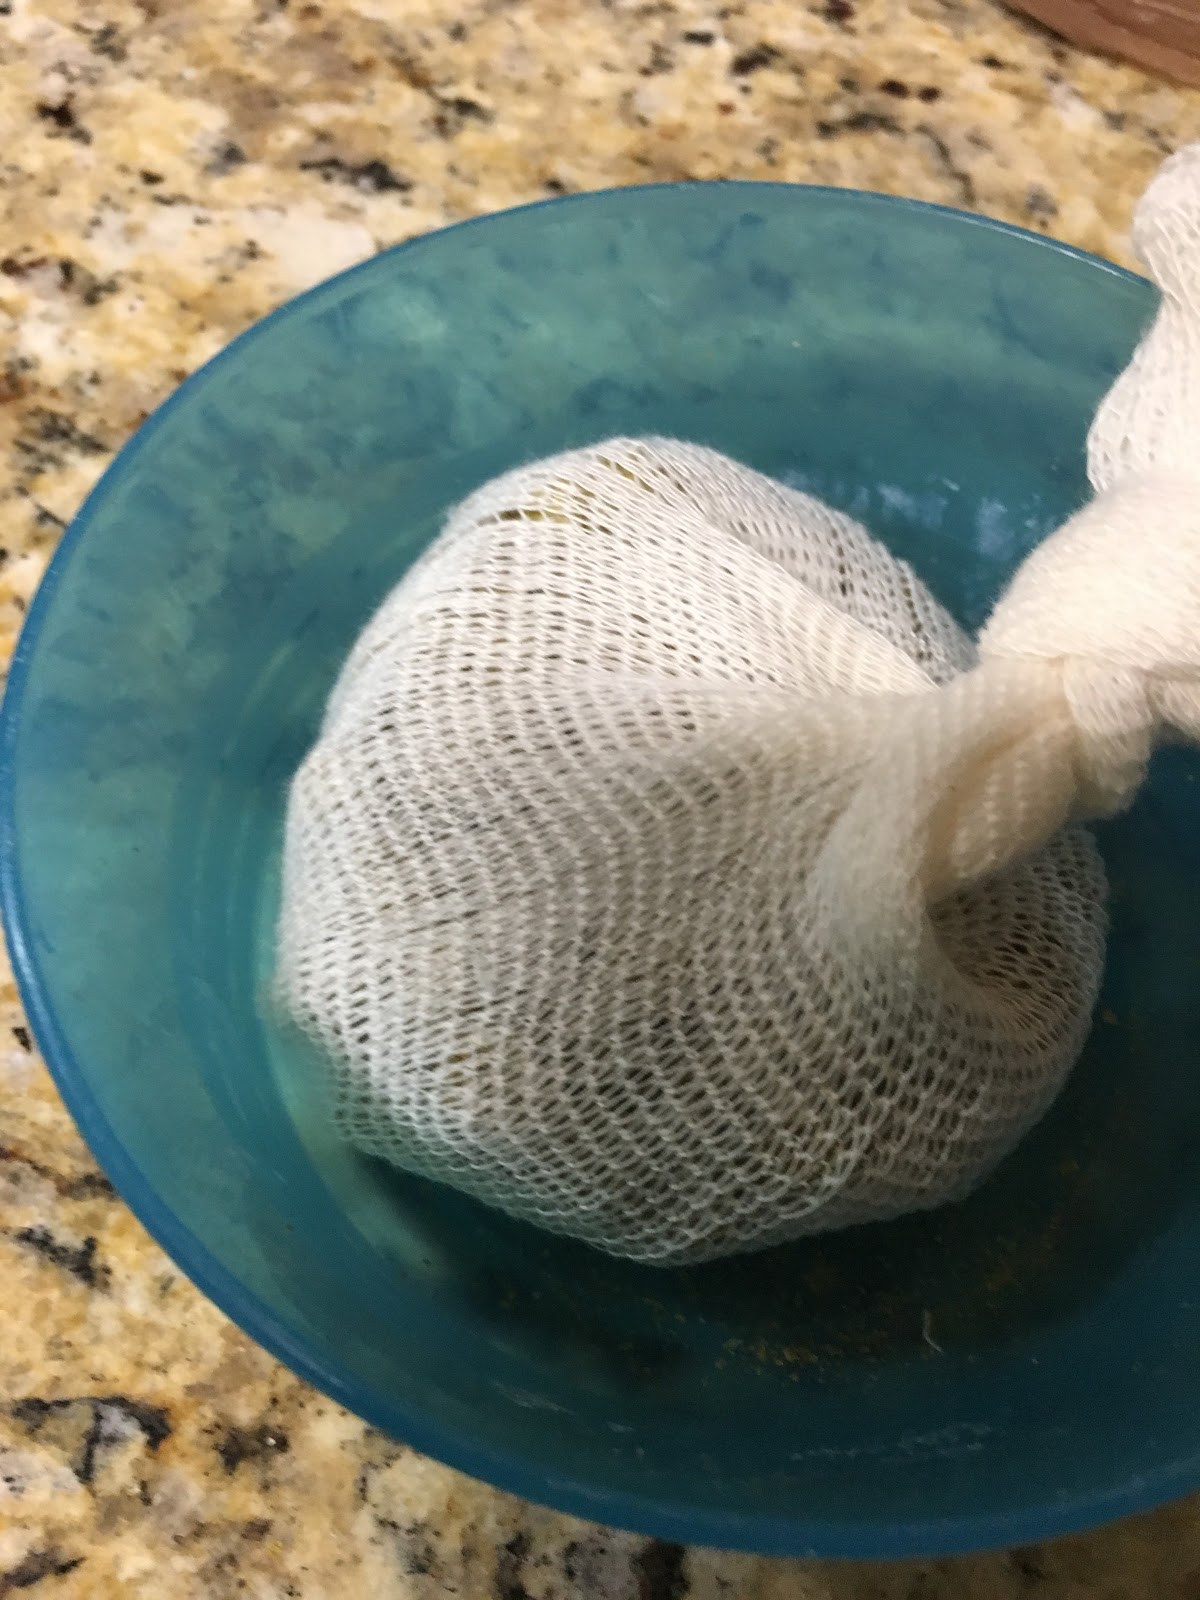
Maybe I should've double-checked everything first, idk.  But I trusted the shop, and didn't want to worry about grain spilling everywhere on their countertops and floors, so I just took everything home and, on brew day, opened the pack.

Everything was in one bag. What.  The.  Fuck.  So now, my stout would be far too pale, and my pale would be much darker than it should be.  This wasn't supposed to happen!
If it weren't for the 2-hour round trip, I would've made a big stink, but you gotta do what you gotta do.  So, I adapted and overcame.

Whatever happens, it will be fresh beer, which will taste good, if not exactly the profile I was hoping for.  And most of my crew aren't beer-picky, so they actually didn't seem to care too much.  Ultimately, we spent around $70 for 7 gallons of beer*   Well, let's throw it together and see what happens!
*7 gallons = 128oz x 7 = 896oz = approx. 70 bottles = approximately twelve 6-packs. Considering most craft brew is at least $10 a pack (with special holiday brews often costing upwards of $15), if this beer isn't horrible, we've saved more than $50 making it ourselves.  Not.  Bad. :)

----------------------

What I ended up with: 

Grail Bill (total, for both brews)

  • 15lb pale 2-row (1.8L)
  • 1lb Caramel 120L (US)
  • 1lb Chocolate malt (dark)
  • 1lb Chocolate malt (pale)
  • 0.5lb Crystal malt 45L (C-45)
  • 0.5lb Flaked Rice
  • 1lb Flaked Oats
  • (Total of 20lbs grain, all fucking mixed up together like a bunch of bitches)


hey stormtrooper, you dropped this *makes finger circle*

"These Aren't the Grains You're Looking For"

American, er.. Something Ale

  • 7lbs "Grain Bill Mix"
  • Boil Size: 4 gallons water (Final Batch Size: 3)
  • 1oz Warrior Hops @ 60
  • 1tsp Irish Moss @ 15
  • 1oz Falconer's Flight Hops @ 5
  • 1pkt Safale US-05 Yeast (made starter at flameout, pitched at 82F)
  • 1-2oz -either- Sorachi Ace or Falconer's Flight @ Dry Hop, 3-4 days
  • OG 1.030
  • Expected OG: 1.046

Here's a link to my Johnnie Flyer APA recipe, which is what this beer was supposed to be.  Johnnie Flyer is a light APA designed in honor of Hugh Johnston, an American war hero and my wife's grandfather, who flew the China-Burma-India supply hump during WWII, as well as flying missions out of southern China.  It was a light ale, cleaned and crisped with rice, and hopped up with Sorachi Ace and Falconer's Flight, and I first brewed it for a huge wedding anniversary on her side of the family, receiving a lot of welcome for the refreshing, slightly floral, very citrusy flavor, which worked great for the summertime event.  I've since lost the original recipe that was so successful, and am working to recreate the next best thing.

Ok, the grain problem sucked, but we're gonna make the best of it, alright??  Well, shit.  Second problem: the mash.  I've almost always mashed on the stovetop, paying very close attention to temperature, which can be painstaking to do for an hour or longer.  For Darkseid, I actually got the temp just a little high, then set the pot in the hot garage, with a couple blankets around it to hold in the heat.  It didn't work very well, but I still managed to get hella high mash efficiency - probably over 85%.  I've always read about using coolers.  The perfect poor man's mash tun!  Just clean it out, throw in the grains, then the water (at the right temp), then let it sit for an hour.  So we did that, and the temp maintained itself very well.  But, and I didn't realize this at the time (I probably should've done a pre-boil gravity reading like the pro's do), but this resulted in a really, really low mash efficiency!  Even after sparging with about 1gal, and then squeezing the grain bag to get every last bit of wort out of it, I still ended up with an OG of 1.030, instead of target 1.046.  That will make the beer much lighter, and reduce ABV by almost a full percent.  We had a similar problem with the chocolate orange, 1.045 instead of target 1.071.  Definitely gotta figure out what's going on with cooler mashing; should I have mashed for another half hour or so?  Maybe I'll stick to mashing in a pot covered in blankets instead.

The rest of the brew for this beer, which we're gonna call Grains for short, turned out mostly ok, but not great.  Took longer than expected to cool; maybe I'll need to invest in a wort chiller next?  But I ended up with only about 3 gallons instead of closer to 4 that I wanted.  Given how light everything was, I decided not to top it off with additional water, and to just deal with it as it was.  There was also a ton of sediment despite tossing in irish moss at 15 mins; this beer is going to be full of trub.
Flavor was bready, almost like Cheerios, with very light hop aroma in the background.  This will need some dry-hopping later to give it a pop.  Either going with another 2oz of Falconer's Flight to enhance what's there, or 2oz of either Sorachi Ace or Lemon Drop to bring out more citrus.

Pitched the yeast at about 82F - near it's top range, I know, but it'll figure itself out - and then set it in the fermentation chamber, which will sit around 63F.

------
Wife bought me a shirt with this on it a few years ago.   It was clear this needed to be a real beer.
Wife bought me a shirt with this on it a few years ago.
It was clear this needed to be a real beer.

That's No Moon

Chocolate Orange... maybeStout?

  • 13lb "Grain Bill Mix"
  • Boil Size: 5 gallons (Batch Size 4gal)
  • 1oz Amarillo @ 60 min
  • 1tsp Irish Moss @ 15
  • 1lb lactose (milk sugar) @ 10
  • 1oz Lemon Drop @ 5
  • 8oz Ghirardelli Unsweetened Cocoa Powder @ 5
  • 1oz orange zest @ 5
  • 1pkt Safale S-04 yeast (pitched at 82F)
  • 4oz cacao nibs, 6-8oz orange zest, 1-2oz Lemon Drop Hops (maybe) @ dry hop (3-5 days)
  • OG: 1.045
  • Expected OG: 1.071


Original Intended Recipe: That's No Moon Chocolate Orange Stout

Now for what we came here to do!
The goal of this beer was to have a dark (chocolate milk) stout with very, very obvious chocolate up front, but also a ton of orange.  I want it to taste like a holiday dessert - a Terry's Chocolate Orange!  Maybe I can convince my wife to try one (she hates beer).  The decision to make a chocolate orange came from the group.  I had a couple ideas for Christmas ales, all dark and stout/porter-ish, and one of the guys was all, "Dude.  What about a chocolate orange?"  We were sold.  Took a lot of research to develop the recipe; not many good chocolate orange stout recipes are out there, and most that are tend to be very weak on the orange, or rely on chocolate malts for the darker semi-chocolate flavors, so my research went into intensely chocolate stouts (of which there are many proven recipes), and research into how people use orange in different beer varieties.  The consensus seemed to be: cocoa powder and some orange zest at the end of the boil, and cacao nibs plus a ton of zest during dry hopping.  Additionally, hops that will bring out a bit of an orange flavor, or a stronger citrus (but closer to orange or lemon than grapefruit or flowers) would be a great idea for this one, so we chose Amarillo and Lemon Drop.

The brew for Moon went a little better than Grains, though with the same really poor gravity results.  While the mash was far paler than a stout should ever be, that chocolate did real justice hiding that fact!  This one came out looking like chocolate pudding, and a strong chocolate flavor on top of a biscuit.  Like a chocolate biscotti!  Practically no hops or orange flavor (just a tiny hint in the background), but that's to be expected with so much chocolate in there.  Oh, and only 1oz of zest??  Yeah... I bought clementines because we decided zest from sweet oranges would work the best, but did you know it's a pain in the ass to zest clementines?  Whatevs; the kids love them so they won't go to waste.  I'll probably buy a bunch of regular, larger sweet oranges  for dry hopping.  The hops should come more forward later, too.  Amarillo for bittering and Lemon Drop for aroma, should give it that orange-citrus feel, and I may add another ounce or two of lemon drop during dry hop stage (3-5 days, about two weeks before bottling time).  I also expect the cocoa flavor to die down over time, so 4oz of cacao nibs will go in at the same time as everything else, to keep everything gooey chocolatey.  It just means I need to up the ante with orange & hops a bit.  Worst case scenario, I'll end up adding a pinch of orange zest to each bottle to ensure everything pops - a labor-intensive act, but a labor of love for a Christmas batch.  Plus, I should be able to get the crew back together; bottling day with a group will be hella faster and less slow and boring than brew day was.

----

Epilogue

Well, some things didn't go as intended, but I think overall, we're going to end up with 7 gallons of delicious beer, and possibly even a new idea for recipes, if this goes well.  Everything is a learning experience, and this is the first complex beer I've made in like 5 years, second beer period since moving to Florida.  You can't win them all, but most beers can be recoverable, and the important thing is to learn and improve!

Oh, and I almost forgot: We had a bunch of the remaining Darkseid yesterday, including the two cold brew coffee variants I made (those sat in the fermenter for about 2 months).  Turned out fucking delicious.  Was compared favorably to Duclaw Brewing's Sweet Baby Java, which makes me very happy.  I will be doing a larger cold brew stout or porter batch based on this recipe in the future.

  I'll update when These Aren't the Grains You're Looking For is ready to drink, probably about a month from now.


Tuesday, August 6, 2019

Coming Soon: Chocolate Orange Stout!

It's almost that time again!  Yep, time for stores to bring out all their Halloween stuff.  Well, if you check out craft stores, you'll probably see them starting to bring out all their Christmas stuff, too.  WTF??  WHY???  Well, simple: those crafts often take months to complete, so starting in the Summer or early Fall is the only way they can guarantee to complete in time to gift or decorate by Thanksgiving (or shortly after).

With beer, it's much the same thing.  Even the simplest brews usually take at least a month to properly prepare, so those easy-drinking summer ales need to be brewed late Spring, and naturally, Fall and Winter brews need to start in the Summer and early Fall.  Some big beers can take several months to mature.  Even if they're not mead or barleywines designed to age for years, many stouts, porters, and Belgians often need an extra month or three for the flavors to meld, and for any esters or diacetyl flavors to clean up, so it's important to plan these things a few months in advance.

Dude... THIS!  but in a beer!  *mind blown*
Dude... THIS!  but in a beer!  *mind blown*

This year's Christmas Beer will be a Chocolate Orange Stout.  I'll be doing another collaborative brew, like with The GRAPH, but this time the recipe will be a bit more organized.  Planning to brew the last weekend of August, for an expected bottling mid-October.  Beer should be ready to drink mid-late November, meaning plenty should be around for Christmas!

At first, I was planning on revisiting What's This?, the Christmas beer I made about 6-7 years ago that turned out pretty delicious, but I talked it over with some friends who will help brewing, and we decided a chocolate orange would be more fun.  Who doesn't like those chocolate oranges?  You know, the British ones that only show up around Christmas and need to be smacked on the counter to break them apart.

I've been able to find a ton of chocolate stouts and porters that are pretty well tried and true -- even some peanut butter chocolate ones -- so it should be pretty easy to get a deep, in-your-face chocolate flavor.  Most likely, it'll involve some low-temp mashed chocolate malts, with cocoa nibs added close to flameout.

What's been more difficult is finding recipes for a chocolate orange stout.  Searches have turned up several people asking how to make one, but very few actually described their experience or best practices.  DoubleDach did one here, about 10 years ago, and gave some lessons learned that have so far been very inspirational, but I've found very few other posts describing the process, or how it turned out.  The biggest thing I've learned is that some people think 3oz of dried orange peels for 5 gallons is far too much, but others don't think it's near enough.  The final verdict seems to be to start small, but make more extract than you plan to use (I'm going to use zest from clementines and put them in some liquor instead of buying pre-packaged dried orange peel).  If the orange flavor isn't forward enough, I can always add more at bottling, until it tastes right.  Assuming the beer fermented long enough, there should be relatively few changes in the overall flavor due to bottling.

The goal here is to make a beer that is very forward in chocolate, with a strong orange undertone, while avoiding tasting syrupy or excessively sweet.  It'll be a dessert beer that you sip slowly, rather than chug a six pack.

Finally, I'm also seriously considering brewing a quick light ale at the same time - maybe an Oktoberfest-adjacent Amber or something lighter - that should be ready by the time we bottle the chocolate orange.  It'll most likely miss actual Oktoberfest (Sep 21 - Oct 6 this year), but maybe I'll plan better next year.  This would be something small and inexpensive that can produce enough beer to tide us over until the chocolate orange stout is ready, since it's unlikely my two gallons of Darkseid will last that long.


Saturday, July 27, 2019

Darkseid Tasting Day 001


Eleven days have passed since I've bottled Darkseid Black Ale.  I ran out of already-made beer, and since I'm impatient and didn't want to drink a lot of liquor, I decided to try a bottle.
Darkseid -  ready to open with the Dark...  er, side.. of the Force!
Darkseid -
ready to open with the Dark...
er, side.. of the Force!


I expected minimum carbonation, and undeveloped flavor - and I was disappointed.  While certainly not completely mature yet, this beer is fully carbonated, and quite drinkable!

So I pulled one out of my fermentation rig, cooled it in the fridge for a couple hours, and popped the cap.  Immediately, I heard a nice, loud, crisp "pffft!"  That was unexpected.  But be still my beating heart!  I poured the brew into a pint glass just a little more quickly than I should've, and got a TON of head.  Carbonation: completed!


who likes head?  this guy
Wasn't expecting that...

The aroma from the bottle is a little piney, a little citrusy, just a hint of malt in the background.  The head pours thick and brown.  The beer appears almost solid black, turning a deep brown when placed against a bright light -- there's absolutely none shining through, except around the very edges of the glass!  Dark, indeed.

Deep, dark brown when exposed to te light.
Almost black otherwise.  This is some serious shit!


When tasted, there's a strong buttered biscuit flavor that should be in the background but totally isn't, with some spiciness (from the Saaz), and something else there I can't quite figure it out yet.  There's a buttery, creamy mouthfeel that's actually kind of pleasant.  The aftertaste is fresh, a little spicy, just a bit citrusy maybe.  Those hops are definitely in there, but not overwhelming.  Oddly, there's zero chocolate flavor; hopefully that will develop later.

That head calmed down after a few minutes, but a short, thick, creamy head remained through to the end, very satisfying.

What's better than head?  Head that lasts forever!
That buttered biscuit (almost butterscotch) flavor is partly from the darker malts (the biscuity part for sure), but bulk of it - that in-your-face part - is from a compound called diacetyl, an off-flavor produced during fermentation.  According to the internet, a "diacetyl rest" involving several days at a higher temperature should cause the yeast to mop up that flavor, so I've raised the temp in my fermentation chamber from about 67 to about 72, which should allow the yeast to do its thing a little more effectively.

Well I deserved that.  I hadn't intended on testing this beer for at least another week, so that's the consequence I must live with.  It's still a decent beer.  Won't win me any competitions, but I'm positive that a couple more weeks of bottle conditioning will significantly improve this beer.  If my previous batches were any indication, in about 2-4 weeks, I should expect to taste some chocolate, the diacetyl flavor should die out, and the Sorachi Ace might bust in there a bit, giving maybe a slightly spicy lemon-chocolate touch.  Or at least I can hope.


Until next time...

Wednesday, July 17, 2019

Can you truly bottle the soul of Apokolips?


Bottling Day!
Bottling Day!
Today, I had an unexpected day off, so took the time to bottle.

First, I brought out the sanitizer, and started the laborious process of washing and sanitizing my bottles.  I save a lot the bottles from beer that I buy for just this occasion: glass bottles can be sanitized and re-used hundreds of times!  But one of the tough parts is getting the old brewer's labels off!  So, a half hour soaking in warm, sudsy water, plus some time with a scraper, and they're generally clean.

  While they dried, I prepped the sanitizer, started sanitizing all of my tools, and drew one last sample from the fermenter.  The biscuit malt flavor is a little stronger, as are the hops (I dry-hopped with 1oz Sorachi Ace 5 days ago, bringing in a bit more citrus/lemon profile, which is now showing!)  I can tell the alcohol is higher.  My final gravity reading was 1.010 (Original Gravity was 1.058), which means my ABV at the time of bottling is approximately 6.3%.  For reference, your redneck cousin's Natty Lite clocks in around 4.2%, meaning Darkseid packs 50% more alcohol.  Most full-flavor mass market beers out there are around 5%, 26% weaker than this baby.  In fact, the Lord of Apokolips is equivalent to nearly 2.5 Michelob Ultras!  While no Barleywine, DARKSEID can take down most of your average superheroes easy.

The Blue Boy will still drink this stuff like water...


  Great!  Next step: add priming sugar.  I have a couple main options: The standard method is to add all of the priming sugar I need for 2 gallons (something like 1/2c) into a bottling bucket (any bucket at least as big as my fermenter, with a spigot in it), rack the beer from the fermenter to the bucket, and give it a whirl to mix the sugar up.  Then, just fill the sanitized bottles.  But no, I am not that efficient; I am more hardcore!  So naturally, I grabbed a sanitized funnel, and literally poured 1tsp of priming sugar into each bottle.
  After that, it gets filled with beer, and then capped.  Give it a good swirl to ensure the priming sugar is well distributed around the bottle (gives a boost to carbonation), and we're all set!


  I will be priming (carbonating) and conditioning these bottles for at least 2 weeks.  Most likely, it'll turn into a month, but either way, I should be back here in 2-3 weeks with tasting notes!


trub (pronounced troob), and a hop sack!
Whatchyoo gonna do with all that gunk inside that trunk?

Finally, the cleanup.  The fermenter had a lot more trub than I expected, but that's fine; it's full of nitrogen, and so are the hops!  So, into the compost you go!  Maybe we'll actually grow grass next year.

Hops bag, after 5 days of dry-hopping.  Not so dry anymore.
Anyway, things are looking good for this beer.  If it works out, I'll probably make a stronger version of it, and call it Darkseid v2.0.  The great nemesis of DC Comics deserves a killer stout or barleywine.

Oh, and one more thing... I made cold brew coffee yesterday, and then spent all evening reading about using cold brew in beer.  So, I added about 3oz concentrated cold brew to two of my bottles.  I'll let these condition at least a month, maybe two before I try them; we'll see what happens!

Will the added coffee ruin those two beers?  Find out next time on...
DARKSEID... plus COFFEE!
Is this truly the end of the world?
Probably not... but there's only one way to tell!


Sunday, July 7, 2019

Darkseid Black Ale - Testing Day 001

Slimy, yet satisfying!

Stardate 72979.9, one standard Earth Week past brew date.  Taste Test #001.

Brew pours very cloudy, indicating activity still in progress (I may have jiggled the fermenter a bit before pouring, which might have knocked a little extra trub up, but it wasn't significant).  Resembles cappuccino.  Settles to a dark brown, but takes a while.

Aroma: malt and pine, with notes of chocolate

Taste: That's a little tougher to say.  There's a lot going on here.  It's not "bad", but you can tell it needs a lot more time to flesh itself out.  All of the flavors from the aroma are there, swirled together, with just a bit of heat in the back, so that alcohol is definitely working.

The hops are definitely there, though the flavor may mellow out over time.  Malt and biscuit are in the background, but noticeable: this will be no IPA.  I'll probably need to dry hop just a bit, starting next weekend most likely; might grab some whole leave Saaz to increase bite and reduce gritty trub volume.

The best news is, there's no off-flavors, so there's no worry of contamination.  Once this beer clears up a bit, and has some carbonation to crisp up the mouthfeel, I think this will be a very effective brew.  Right now, it's a bit too mellow.
Bubbling along!
Bubbling along!
I'll be checking back in maybe 2-3 weeks from now, after dry-hopping is complete.  If the flavor's on, it will be time to bottle!

Sunday, June 30, 2019

DARKSEID Black Ale

Wow, this ale is darker than I thought.  I should give it a Star Wars name.  Like Vader something.  Vader's Dark Side.  Dark Side ale... Dark Side... Darkseid.... whoa that's not Star Wars at all!  But he did beat the shit out of Superman, so maybe it's appropriate.
When your beer is darker than you expected...

UPDATE:
The Brew.
5lbs 2-row pale malt, 4oz Crystal 120L, and 4oz Chocolate malt.  Here's what it all looked like after the mash was done.
First, I mashed the grain.  This is a kind of steeping process that converts the starches in the grain into sugar.  I ended up with a pH of 4.6, which seems good; I'll have to do some calculations to determine what exactly that means, but my OG (more below) was higher than expected, so my starch-sugar conversion efficiency was well over 70%.

Mashed in a 5 gallon pot.  Brought the water to 165F, then wrapped this pot in an old jacket and some sheets to help it maintain temperature, and let the grains steep for 60 mins.  When it was done, the temp was only 114F, which seems disappointing, but the conversion must've happened pretty quickly, given my results later.  I did not end up with a weak beer.


The Mash - Pre-boil Wort (that's the liquid malt)


Next, I boiled the water and added my hops.  0.5oz each of Falconer's Flight and Sorachi Ace for bittering at 60, 1 oz Saaz at 30, and the rest of my hops (another .5oz ea of FF & Sorachi) at 5 mins, along with some irish moss to help reduce trub just a bit.  (That didn't work out so well; you're supposed to start the irish moss at 15 mins)

This shit permeated the entire house.  While I thought it smelled nice, everyone else disagreed.  What's worse, by about 11pm, the house was covered in a cloud of malt that was actually hard to breathe in.  I ended up having to air out the house, which is going to really hurt my electric bill today.  Lesson learned.  Wife says from now on, no more brewing indoors.  I guess I'll have to buy a burner and set up a rig in my garage, like a real brewer!
The Boil

Boil complete!

During the boil, I started my yeast with warm tap water and 1tsp priming sugar.

Ice Cream and Yeasty-cakes!
Starting the yeast early helps increase its
efficiency and effectiveness.
You can probably start your yeast after flame-out, instead of near the beginning of the boil like I did.  You really only need 10-20 minutes max to get it going; I probably had over an hour.

At flame-out, I whirlpooled about 5 minutes.  That means whisking it briskly until you see a whirlpool forming, then keep going.  According to Einstein's Tealeaf Paradox, whirlpooling moves the solids in any liquid toward the center, which can help reduce trub size ~ or would if I had poured properly.  This also helps cool the wort faster, as it's constantly coming in contact with cooler air or the cooler sides of the pot.

I let the pot sit for 20 mins or so in an ice bath, and whirlpooled some more, to help further bring the temps down to pitching temp: around 80F.

Look at that sweet black nectar!  This is going to be something else for sure!
Much darker than intended.  But about as expected,
since i doubled the chocolate malt and forgot the Munich (red) malt.
Once the temp got below 80, I poured it into my fermenter, an old Mr. Beer barrel that holds just over 2 gallons.  These babies are awesome for small batches, and have a nice shallow pan at the bottom that helps keep the trub out of your bottles when everything's done.  

Once the beer was safely in the fermenter, I poured out a sample.  This thing had a ton of trub: you can see it floating in the image above!  Original Gravity comes out to about 1.058 (I added .002pts due to testing at 79F instead of 68F).  Assuming my Final Gravity predictions are correct, this should up my original ABV to around 5.6-5.7%, though the cool fermentation chamber may drop those numbers just a tad.

The Pitch. Look at that yeast cake!
 Next was pitching the yeast, a Safale US-05, which prefers pitching temps between 77-84F, and fermentation from 64-82F.  Lower fermentation temperature will slow things down a bit, but may help boost the flavor, and make it more crisp and clean tasting.

My sweet fermentation chamber!
 Temperatures in Pensacola flux a lot more than where I've lived before, and I have a large garage here, but no basement or inner storage closets, meaning I pretty much had to build a temperature-controllable fermentation chamber.  Fortunately, we had to replace our old fridge, so a few mods later...
This baby controls my fridge's temp, keeping
it high enough to ferment 
The temp controller in the pic above will control the power to my fridge, turning it on when it gets too hot, and off when it gets too cold, which should maintain temps around 65F, +/- 3F, over the long term.  That colder temp should slow down fermentation and help the beer maintain a clean profile - something dark beers aren't typically known for.

I totally failed at making an Amber ale.  Well, I can try again next month, I guess!

Meet DARKSEID.  It was meant to be an Amber, but I forgot the Munich and ordered too much chocolate.  Now it resembles black coffee.  This ought to be interesting!

when your beer has so  much bite your eyes blow up
Extra hops should give this villainous beer a bite, and keep things interesting.

Even as a dark ale, it shouldn't be heavy enough to be a stout, and probably won't have the body or head retention to give it that feel.  I'll probably also dry-hop later on with 2oz of hops; I'm thinking Falconer's 7C's or Sorachi Ace.  I expect this will be a very drinkable beer on a hot day, if not quite the refreshing Amber I was originally aiming for.

Here's the recipe:
Style: Failed Amber Ale, Black Ale, All-Grain
Yield: 2 gallons
Color: Dark, Near-black
Bitterness: (TBD; too lazy to calc IBU's)
ABV: Expected 5.6-6.0%

5lbs 2-Row Pale Malt
8 oz Crystal 120L Malt
8 oz Chocolate Malt
.5 oz Sorachi Ace (60 mins)
.5 oz Falconer's Flight (60 mins)
1 oz Saaz (15 mins)
.5 oz Sorachi Ace (5 mins)
.5 oz Falconer's Flight (5mins)
1tsp Irish Moss (5 mins)
1 pkg Safale American Ale Yeast (US-05)


  1. Steep all grains for 1 hour, starting around 165F.
  2. Begin boil, add Bittering Hops.  Set timer for 60 mins.
  3. Start yeast (around 45 mins to go), 1/2c water, 1 tsp priming sugar, set close to stove so it doesn't get too cold; covered bowl with towel to retain heat.1
  4. Added Saaz with 15-30 mins to go.2
  5. Final hop bag, plus 1tsp Irish Moss added at 5 mins3
  6. Remove from heat.  Whirlpool for five minutes.
  7. Place in ice bath 30-45 mins, whirlpool for 2-5 mins, occasionally, to help bring temps down
  8. Once temp got down below 80F, removed from ice bath and pour into fermentation chamber.  Take sample (approx. 3/4-1c liquid in a beaker). Use hydrometer to measure Original Gravity.
  9. Pitch yeast.  Give it a good stir to break up the clumps!
  10. Set temp controls in fermentation chamber, and place fermenter in there. 
1. You can probably start the yeast after flame-out.  All you need is 10-20
2. Ideally, probably should've put Saaz in at 30
3.  and Irish Moss at 15.


Now for the hard part: Waiting.  I'll probably check on the temp and activity in the fermenter at least once a week.  Primary fermentation should be complete in about 2 weeks; I'll probably dry hop after week one, then take a sample to see where things are at the end of 2 weeks.  Once I'm satisfied with the general flavor (probably gonna be 3-4 weeks, lets be honest), I'll bottle and condition for at least two more weeks to get some good carbonation going on and complete final clean-up of the beer.

This one is going to be epic.  It might take over the world.

Homage to what might've originally been the title of this beer.

Saturday, June 29, 2019

Catching Up, and a New Amber Ale!

Well, it's been a very, VERY long time since I've posted here.  And sadly, I haven't brewed more than a couple times since my last posting.

Amber ale - there's just way too much froth on that one on the left, isn't there?
American Amber Ale ~ What I'll be trying for today!

In Hawaii, I probably brewed a total of 3-4 times, because it was a little more difficult to do so than it had been in the past.  Those who know me know that a major reason I brew is to get good beer on the cheap, so I don't have a lot of fancy equipment.  In Maryland, I had a basement that allowed me to brew year-round without any real worry of temperature issues, but in Hawaii, the closest thing I had was a closet under the stairs that stayed in the low 70's most days, unless it was particularly hot out.  This really limited the styles I could make, and combined with my busy schedule, higher cost of brewing, and availability of some awesome outdoors activities, I just didn't brew that often.

  Last year, we moved to Pensacola, FL, and our house has NO year-round cool spaces.  Fortunately (though unfortunate at the time), we had a partially broken fridge in our house that we had to replace. I've since been able to fix it up and turn it into a fermentation chamber that can ferment at some very precise temps, and can hold at least two fermenters at once.  This will allow some really awesome brews.

Finally, after putting it off for far longer than I should've, I visited my LHBS (Local Home Brew Store) for some ingredients.  By local, I mean it's almost an hour's drive away - one reason I haven't visited yet.  But I finally got some ingredients, and I'm getting back into the kick of brewing!

Today, I'll be brewing an "American Amber" style ale, just a 2 gallon batch to get me back into the swing of things.  The flavors include some 120L Crystal malt for sweetness and color, plus a bit of chocolate malt for roastiness and a bit of a darker color, and possible chocolate tones in the background.  The original idea was to also add some Munich, which would round out the flavor and help turn the stuff more red.  Not quite an Irish Red, but maybe that vicinity.  However, I totally forgot about the Munich, so we will see how this one turns out!  Maybe it'll just turn into a dark brown ale instead.  Dark Amber? :D

For hops, I've got an ounce each of Saaz, Sorachi Ace, and Falconer's Flight.  Saaz adds some spice; Sorachi helps with bitterness and gives a lemon flavor; and the Falconer's is a cool blend of hops that should help with bitterness and a citrusy flavor.  Together, it should help increase the "bounce" of this beer - make it robustly hoppy - with some nice crisp flavors.  The darker malts will help bring additional toasty flavors that keep it from being a straight IPA.  So, it's not just hop-forward, face-crushing pine cone stuff, but should have some real character to it.

The beer will ferment with standard Safale US-05 yeast, which should give it a relatively clean, crisp finish, if I can reduce how much trub gets into the bottles.

Update later tonight when I brew!

Monday, November 30, 2015

SOURDOUGH!!

Also known as "nomnomnomnomnom"
Making rolls for Thanksgiving dinner made me realize that I love making bread almost as much as I love making beer.  And that I love sourdough bread.  Oh hey, and bread is way cheaper to make than beer!  I like money.  So I made a sourdough starter. (That's the gooey stuff you need to make the dough all sour and super tasty.)

The recipe is simple -- in fact, the one I used from Red Star Yeast was ever so slightly more complex than the bare minimum you need to make a sourdough starter.
Sourdough Starter!
The Start of YOUR Sourdough Empire!


  • 2 cups water
  • 3 1/2 cups bread flour
  • 2 1/4 tsp RED STAR Active Dry Yeast
  • 1 Tbsp sugar

You actually only need 1 part water to 1 part flour, and just let it hang for a few days, but the yeast helps kickstart the process, and the sugar helps kickstart the yeast.  You let this thing sit for around 5 days in a warm spot, loosely (not tightly!) covered, and natural bacteria and yeasts in the air will ferment the starter all on its own.  Then put the stuff in the fridge.  You'll need to feed it more flour/water mix occasionally to keep it alive.

The actual recipe for sourdough bread will vary, but in short, you basically make bread the way you normally would, but add around 1 cup of sourdough starter to the mix.  Then you add a cup of flour & water back to your starter mix, and let it sit for another day or so before putting it back in the fridge.

So long as you continue to occasionally feed it, you can literally keep sourdough starter alive for years.  Some of the more venerable starters have been around more than a century, and are passed down thru families!

Now that's some hooch
So yeah, I made this starter, and what's the big thing yeast does to sugars?  It ferments it!  I think adding the Red Star yeast in the mix helped jumpstart the fermentation process, because after 2 days I can really smell the alcohol.  Now, that will all cook out in a bread, but I can also use this stuff to make a beer!  There's a couple different ways, and you can read more about it here and here.  But basically, you can either use the liquid that appears at the top of your starter over time (just be sure to replenish the water so the starter stays alive), kind of prison hooch style (ready in a couple weeks, in theory), or you can add a scoop or three to your wort when brewing regular beer.  The second method will give you something similar to a cider or weissebeer, but you don't need to use quite as much malt as you'd normally use -- oh, and go easy on the hops.  This style needs to age, though, and most people recommend around 4 months or longer.  But it's so damn easy that I can't not try it!
They really make this stuff!

Most likely I'll be making an experimental gallon of this stuff very soon; probably before I start on the next Taihei batch.

More to come in the future!

Saturday, November 28, 2015

More Taihei! Also, Weather too warm? How about a Trappist Ale?

Since moving here, I've been hampered in the kinds of brews I can make because most beers need to ferment somewhere between 40 and 65F, but I don't have a cool basement, and haven't had the funds to acquire a large fridge that I can temp tune specifically for beer fermentation.  I use a small storage space to ferment my beer in, as it generally stays a steady temperature (we keep the A/C on much of the time), but that temperature is usually 70-73F, so I've had to make some adjustments.

Back in March, I brewed Taihei Ale, a recipe I designed for fermenting in Hawaii's warmer climate. Taihei takes it's name from the Japanese word for the Pacific Ocean, named because many of the ingredients were sourced from around the Pacific Rim (Hops from Australia, New Zealand, and Japan), and brewed right smack in the middle, here in Hawaii.

The beer finished in May, and despite my predictions that it would be too light, or might have fermented at too unstable a temperature, it turned out to be rather tasty, and was very popular with the neighbors.  They keep asking when I'm going to brew again, so I'm going to go ahead and do it!

This time of year, temps are a little more stable, and tend to be in the mid-upper 70's during the day, so I should have a bit of an easier time keeping temps steady.  Taihei wasn't incredibly expensive, either, so it will be easier for me to start this one.

However, I don't want to be stuck brewing the same kind of beer all the time, so I've been scouring the web for more ideas for high-temp fermenting brews.  One that's stuck is the Belgian Trappist Ale, brewed by Trappist monks for around three centuries.  Like many Belgians, these are designed to tolerate -- or even thrive in -- warmer temperatures, so I'm gonna give these a whirl.  One big thing though, is that they need to age.  Possibly a year or longer!  So this will be a long-term project.  Meanwhile, I'll still have Taihei, and whatever else I can think up -- maybe a stout or two.  But I'm really excited about this opportunity to brew another age-able beer!

Not only does the beer sound amazing (oh, and they're real tasty too!), I love the story behind it.  Trappist monks historically brewed their beers to help provide food and drink to both themselves, and the local community.  Like most monasteries, they are non-profit, charitable organizations.  A few years ago, as the Trappist style became popular in the west, craft brewers started using their name on their own beers, so the remaining Trappist monasteries formed the International Trappists Alliance (ITA) to protect their brand and ensure quality on anything labeled, "Trappist."  True Trappist beer must be brewed in a Trappist monastery, and be subject to specific quality regulations.  But this wasn't just a protectionist move: the rules also stipulate that all funds from sale of Trappist beer, in excess of that required to actually produce, distribute, and sell it, must go to charitable causes.

  One of the most popular Trappist brewers out there, Chimay, brings in over $50 million a year, nearly 100% of which goes to local charities.

My beer doesn't go to charity.  Of course, I also give it away anyway (that which I don't drink myself).  But I'm really excited to make a beer style with such a benevolent tradition behind it.

So, back to the beer itself.

Again, the top reason I'm looking at a Trappist style ale is because it can ferment in the 70s.  But being delicious also helps.  The ingredients are pretty simple, but there's a key difference that helps the beer to stand out among other Belgians and warm-fermenters: candi sugar.  I found out how to make it here and its insanely easy.  Armed with that, the rest of the beer can be made simply with Pilsen malt, aromatic malt, a couple types of hops, and some Belgian style yeast.  (This yeast is a little more expensive than the normal stuff, but is the key to warm-temp fermentation).  I love simple; fewer ingredients cost less, and there's less opportunity for error.

Taihei will be the next batch, but after that gets good and going, I'll probably start on the Trappist ale and see where that goes.  Updates to come!

Sunday, March 15, 2015

Taihei IPA -- Brew Day!

Today I brewed Taihei IPA v1.0, my first brew in Hawaii, and first all-grain beer. (click on the link for recipe!)
Again, Taihei, the Japanese word for Pacific (taiheiyou), and the beer is so named because the hops I'm using come from all around that ocean, and I'm brewing right smack in the middle of it, here in Hawaii!

Stats
OG: 1.076
FG: 1.014
ABV: 8.14%
SRM: 9.34

 There were a few hiccups, the biggest one being that I forgot a grain bag for the mash.  A grain bag holds the grain while its being mashed, keeping the solid grain bits from getting into the water (they can provide some off-flavors).  It took another hour and a half to filter out the grains, and I ended up with a much smaller wort (the liquid) than I otherwise would have if I had done it right.  Probably not the smartest thing I've ever done in the brewing world.

The brew itself went mostly well, but I forgot to add Irish Moss, a fining agent that helps clear up the beer.  So... it's really fucking cloudy now.  While I'm sure most of the stuff will settle over time, it will take a while and there will be a butt-tonne of sediment in the bottom of my fermenter.

At the end of the boil, I had well under 2 gallons of wort when I poured it into the fermenter.  That was real bad.  I added about 3 qts of cold water to help cold crash it a little (and protect the fermenter from thermal shock), and replenish some of the lost wort, but the result is going to be a noticeably lighter beer.  Not noticeable yet because its so damn cloudy, but eventually....

Original Gravity after boil reads 1.076, much lower than the 1.083 than my Brewer's Friend calculation estimated, but that's probably OK because it estimated an 8.77% ABV, which is a little higher than what I'd like to make with this beer anyway.  Of course, if things go as estimated, the ABV will still be over 8% -- especially with that healthy yeast starter I used.

The sample tasted very spicy, like ginger and cinnamon -- not too dissimilar to how What's This? tasted during its post-boil sample.  It might be because of all the floating sediment and the barley itself, whose flavor should recede into the background over time.  I can taste the sediment and its gross.  The hops smelled completely different - citrus, lemon, and a hint of floral.  These flavors should come out as it ferments over the next month or so. 
*UPDATE* That spicy flavor dropped quite a bit as the sample wort cooled and settled.  The trub in my test tube also settled real nice, which is good.


Finally, I cold-crashed the wort until it was about 80F, pitched the yeast, and moved the fermenter to the beer room.  I'll take a peek probably once a day for the next couple days, then just check temps daily afterward.  The goal is to keep it between 70 & 75F.  At this high a temp, the beer will ferment much more quickly than usual, which could be good or bad, but I don't have the $$ for a fancy temperature control system.

Fermentation should start soon - probably late tonight or early tomorrow morning, since I made a good, healthy yeast starter.  I expect about 3 weeks in the primary, then I will rack the stuff to a secondary fermenter (another first for me!).  Racking to secondary will go a long way in clearing up this beer, as most of the trub (the stuff that settles to the bottom) will remain in the primary fermenter, and that's exactly what this beer needs.
  After racking, I'll give it another week or so to settle and clear up, during which I'll dry-hop with about 1-2 oz of the Sorachi & Wakatu I've got left over.  After that (assuming gravity stabilizes), the beer will be bottled, and conditioned for another week or two.  All-in-all, it should take about 5-6 weeks at the temps I'm working with, and the beer should be ready for the big time by the end of April!